Unit: Value and Design
Elements of Art: Line, Shape, Value, Space
Curriculum Standards:
Standard 1: Creating, performing and participating in the arts
Standard 2: Knowing and using arts materials and resources
Standard 3: Responding to and analyzing works of art
Standard 4: Understanding the cultural dimension and contributions of the art
Materials:
4”x12” Poster Paper (Size is changeable depending on approach to project); Sharpie Markers (Thin and Thick Points) and Rulers.
Instructional Objective:
The students will use prior knowledge recently discovered on line and shape. Line and shape are key factors in creating patterns and designs, and can also be used to show value. The students will create a black and white design using line, shape and value with a Sharpie marker that is unique and demonstrates their knowledge of the three Elements of Art.
Motivation:
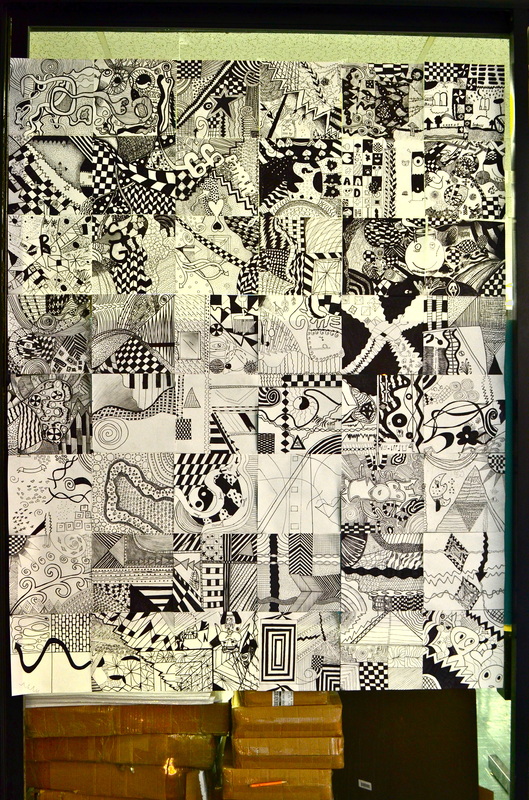
Each student will be given a white oak tag paper, which is very conducive to the Sharpie. Each paper will already have 4-5 marks on it along the edges. These marks correspond with other marks on a neighboring students paper. When each individual design is completed, all the designs created by every class member will connect with one another to form a very long line or large quilt-like square, filled with each of their unique designs.
The students should use one shape to focus on to give their design some continuity, balance and direction.
Artists:
Bridget Riley (Op Artist), Frank Stella (Minimalist), MC Escher, Vasilj Godzh
Vocabulary:
Line, Shape, Shape, Value, 2-Dimensional, Design, Continuity, Balance
Delivery of Instruction:
Day 1 & 2: Line, Shape & Space
Day 3: Pattern
Day 4 & 5: Value
Day 6 - 10: PROJECT: VALUE
Day 11 - 16: PROJECT: Line, Shape, Value Design
Closure:
Display each student’s design together as one large artwork. Hold a critique once this is displayed and discuss the work of art as an individual piece as well as collaboration. Questions to focus on:
Extended Practice:
Sketchbook Assignment:
Wall Text:
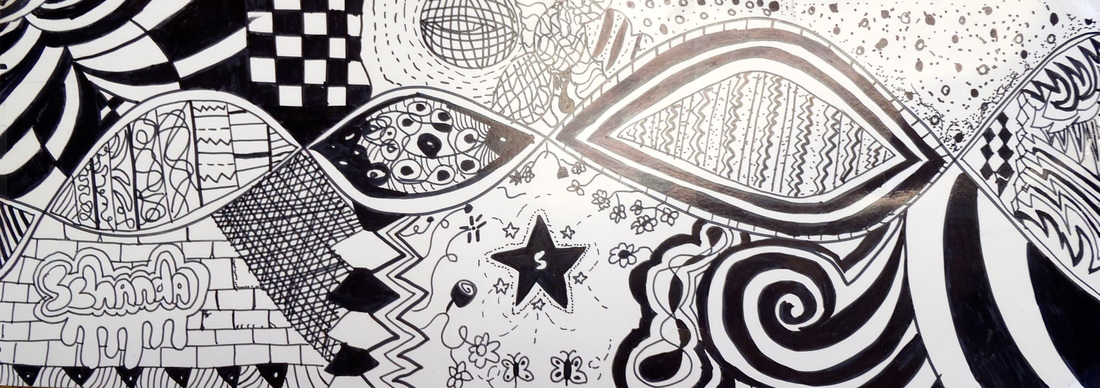
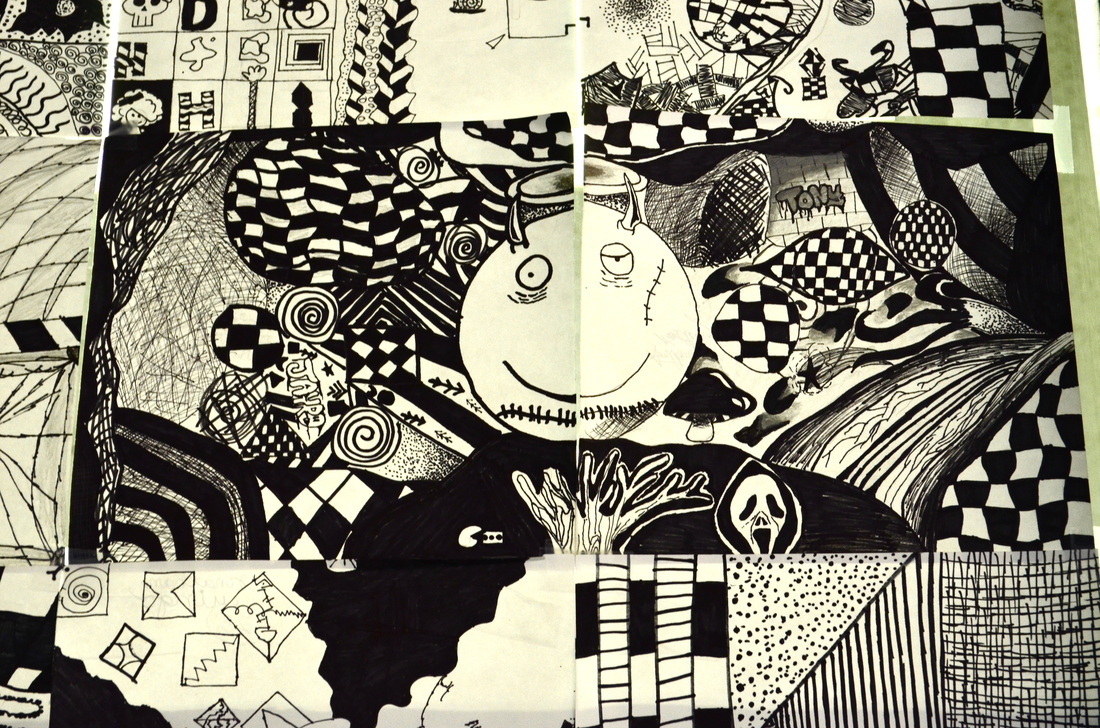
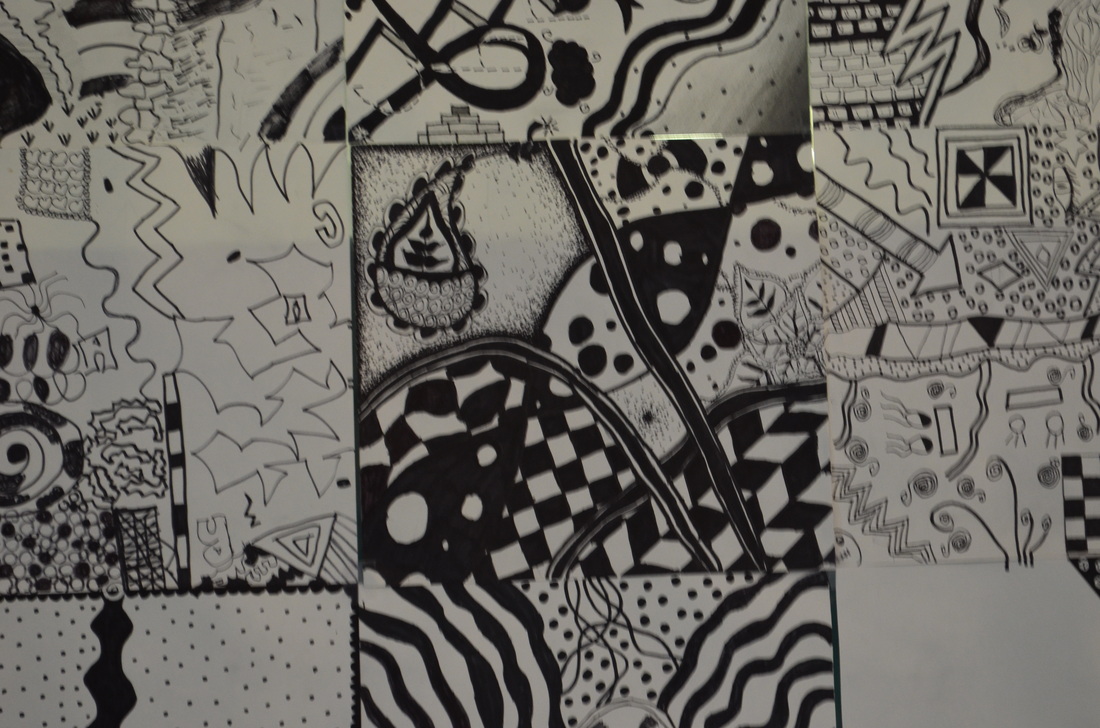
Line is not something that is just straight. A line starts with a dot and can go off in any direction. Line is also what helps us create shapes, patterns and designs, as well as texture and value. Using this knowledge and much creativity, the students each created their own individual designs with nothing more than a Sharpie marker. Each paper is connected to the next persons design, creating a very long line of design.
Resources:
Elements of Art: Line, Shape, Value, Space
Curriculum Standards:
Standard 1: Creating, performing and participating in the arts
Standard 2: Knowing and using arts materials and resources
Standard 3: Responding to and analyzing works of art
Standard 4: Understanding the cultural dimension and contributions of the art
Materials:
4”x12” Poster Paper (Size is changeable depending on approach to project); Sharpie Markers (Thin and Thick Points) and Rulers.
Instructional Objective:
The students will use prior knowledge recently discovered on line and shape. Line and shape are key factors in creating patterns and designs, and can also be used to show value. The students will create a black and white design using line, shape and value with a Sharpie marker that is unique and demonstrates their knowledge of the three Elements of Art.
Motivation:
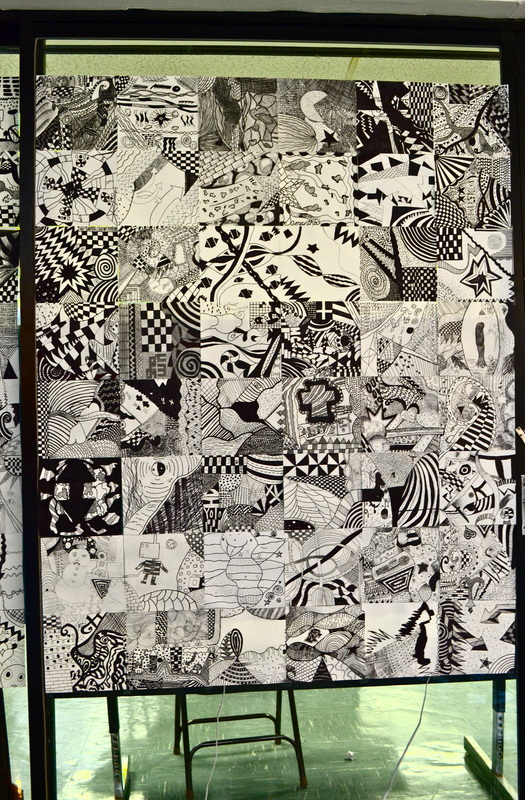
Each student will be given a white oak tag paper, which is very conducive to the Sharpie. Each paper will already have 4-5 marks on it along the edges. These marks correspond with other marks on a neighboring students paper. When each individual design is completed, all the designs created by every class member will connect with one another to form a very long line or large quilt-like square, filled with each of their unique designs.
The students should use one shape to focus on to give their design some continuity, balance and direction.
Artists:
Bridget Riley (Op Artist), Frank Stella (Minimalist), MC Escher, Vasilj Godzh
Vocabulary:
Line, Shape, Shape, Value, 2-Dimensional, Design, Continuity, Balance
Delivery of Instruction:
Day 1 & 2: Line, Shape & Space
- Introduce line. What is a line? It starts with a dot and can go off in any direction. Line can create shape, patterns, and designs. It is also used to show value, texture and define space amongst many other things.
- Review different kinds of lines with the students.
- Introduce shape by demonstrating how line can contain a space, creating a shape. Such as, if I have four equal lines connecting to one another, I can create a square.
- Give the student a 9”x11” paper and instruct them to fold it into 16 boxes. In 16 of the boxes, the students should repeatedly draw as many different kinds of lines that they can think of. 4 of those boxes should specifically include 4 different shapes.
Day 3: Pattern
- Introduce Pattern. What is pattern and where can we find it? Discuss with the students where they might find patterns in their every day lives (i.e. wallpaper, clothing, decorations, nature, etc.).
- Have the students briefly fold a 9”x11” paper into four sections where they will create a unique new pattern in each section using line and shape.
- Next, demonstrate and instruct the students to create 4 different types of texture using lines (i.e. cross-hatching, stipulation, short lines, etc.) in the remaining boxes. Many of these same techniques that are used to create texture, can also be used to create value. Demonstrate this as well.
- Lastly, on a separate piece of paper, demonstrate and instruct the students to create three different value scales using only lines. (In a previous lesson on Value, the students were already taught how to create value adding white and black or drawing lighter or darker.)
Day 4 & 5: Value
- What is value in art? Value is the lightness or darkness of a color, usually shown through a value or gray scale.
- Demonstrate how to use sketching pencils and how to complete the value scale worksheet. The students will complete the worksheet by creating a gray scale, a gradual value scale, a crosshatching value scale, a value scale created with just lines and one with stipulation.
Day 6 - 10: PROJECT: VALUE
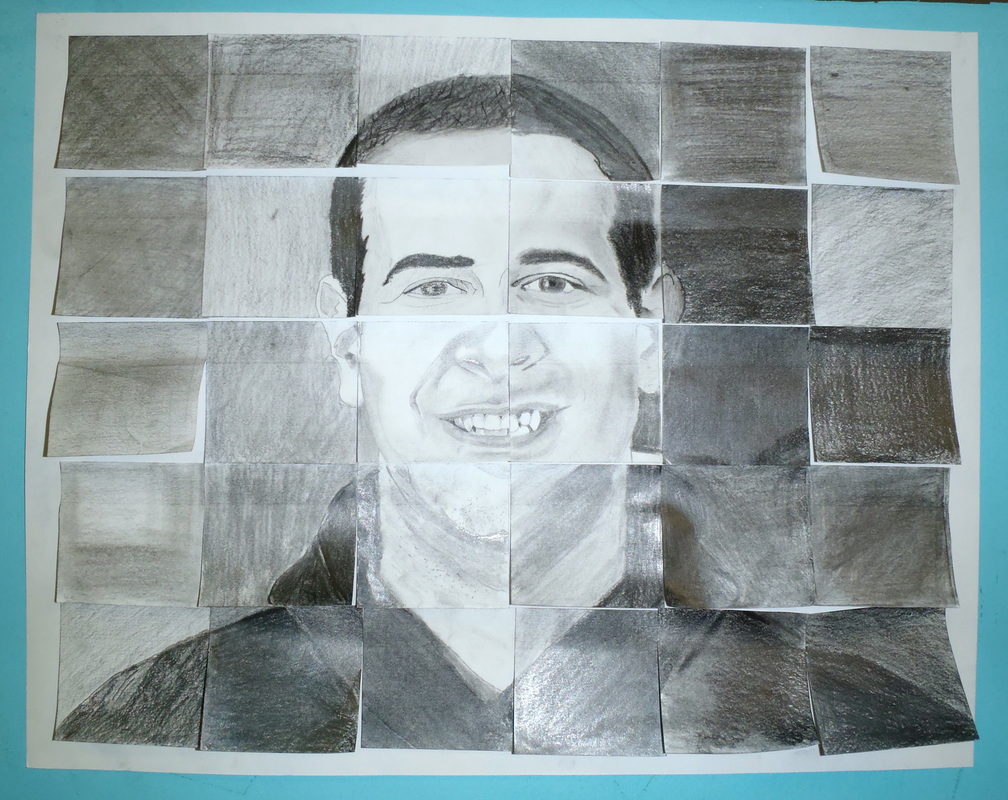
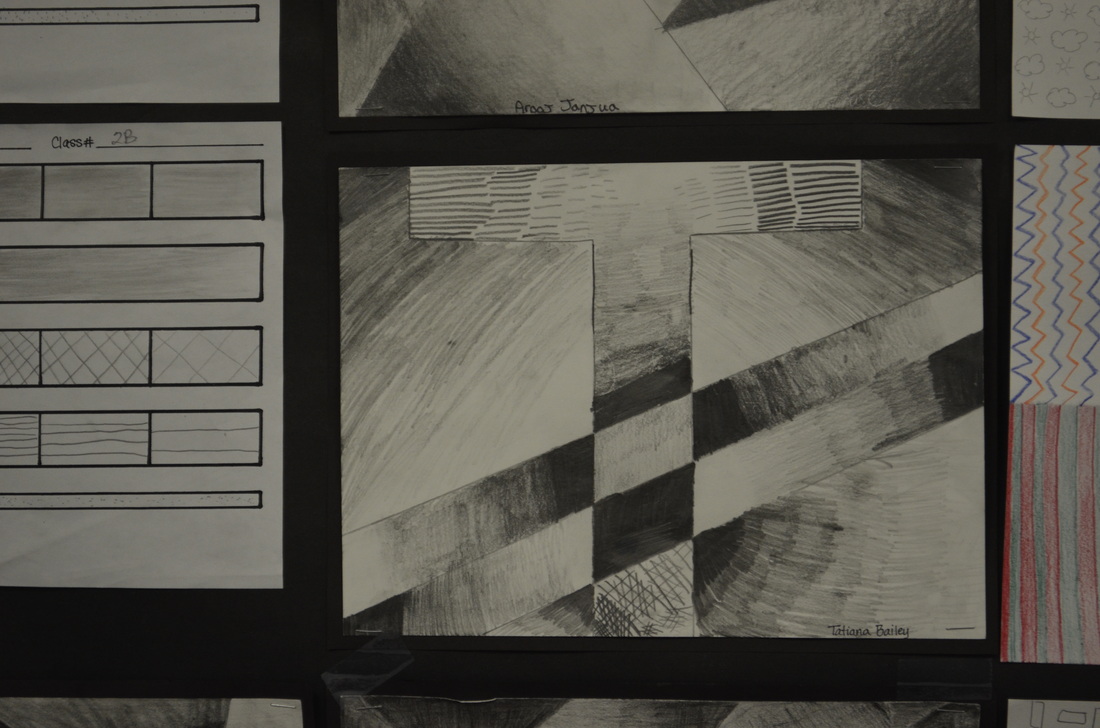
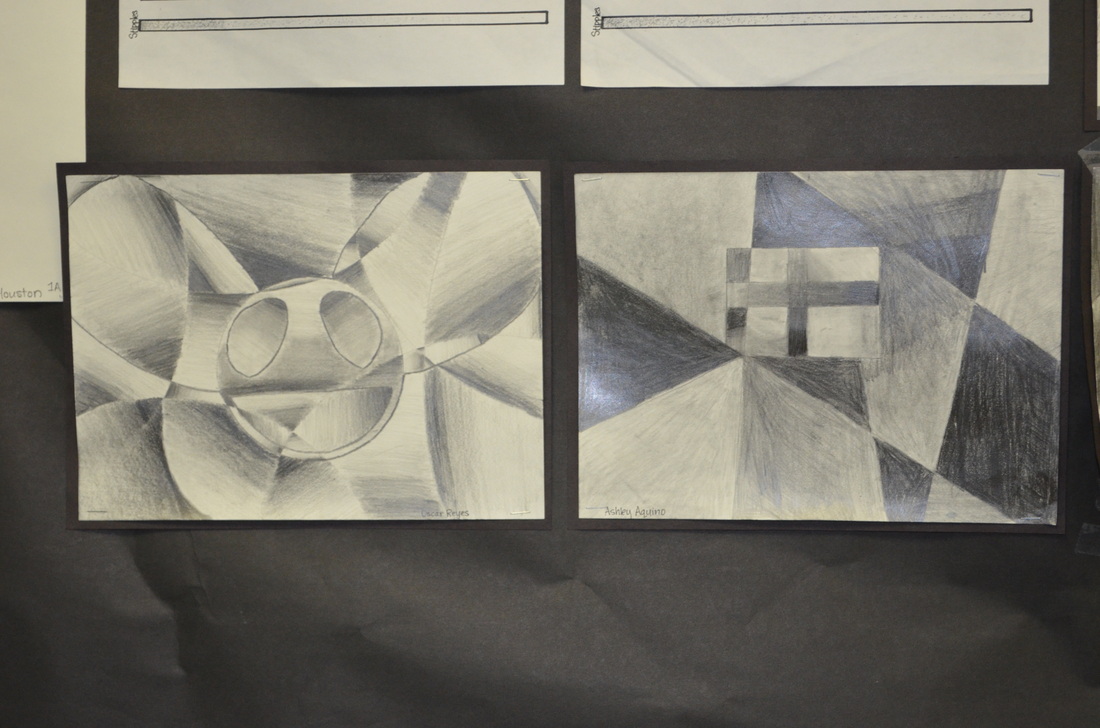
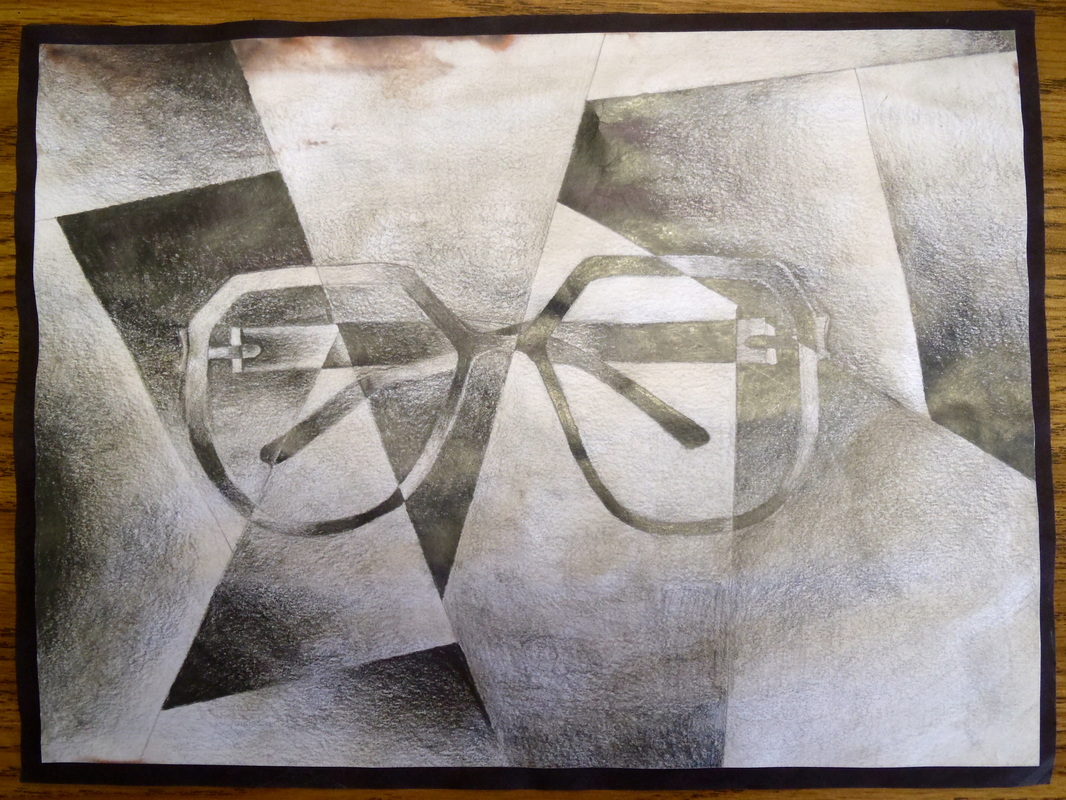
- Broken Value Drawing: Students will draw a simple object in the center of the paper (i.e. glasses, a shape, a letter, a pencil, etc.) using contour line. Review contour line, which is the outer most line of an object that when showing the positive space will include detail but can also define and outline the negative space.
- The students will divide up the entire paper with a few simple straight lines, creating breaks in both the positive and negative space. In each new space created, the students will create a value scale, keeping in mind that the goal is to keep the positive space visible from the negative. The entire paper should be shaded in order to be considered completed.
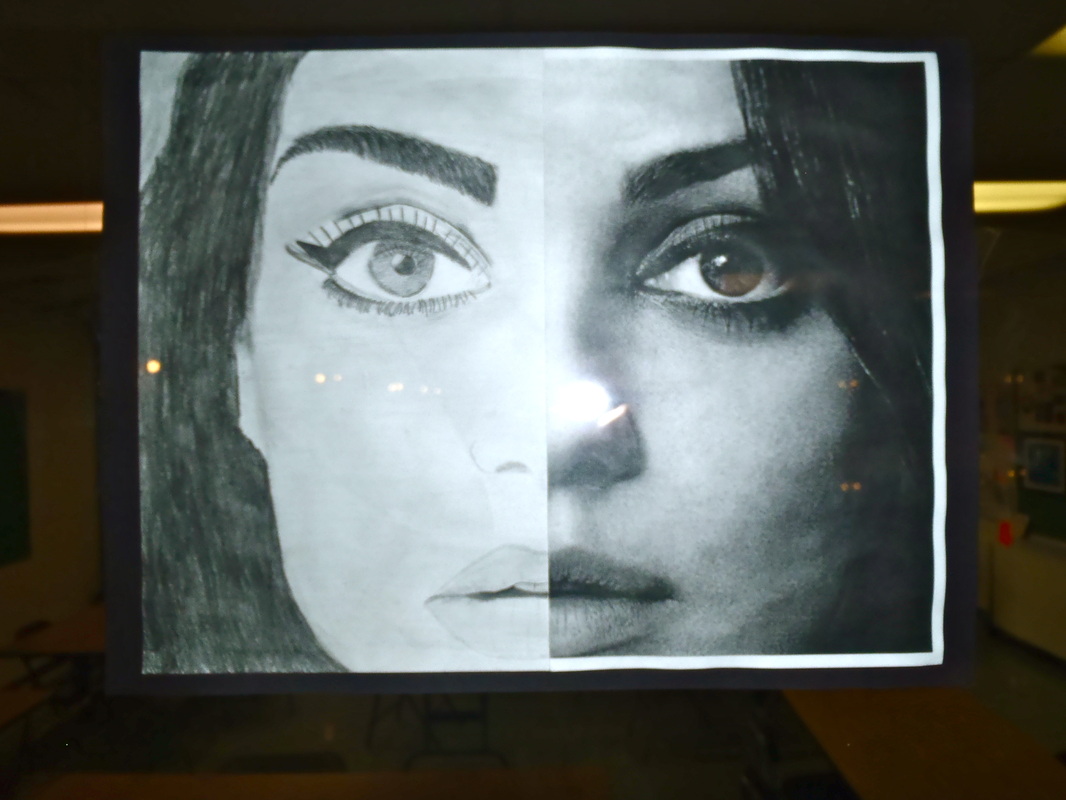
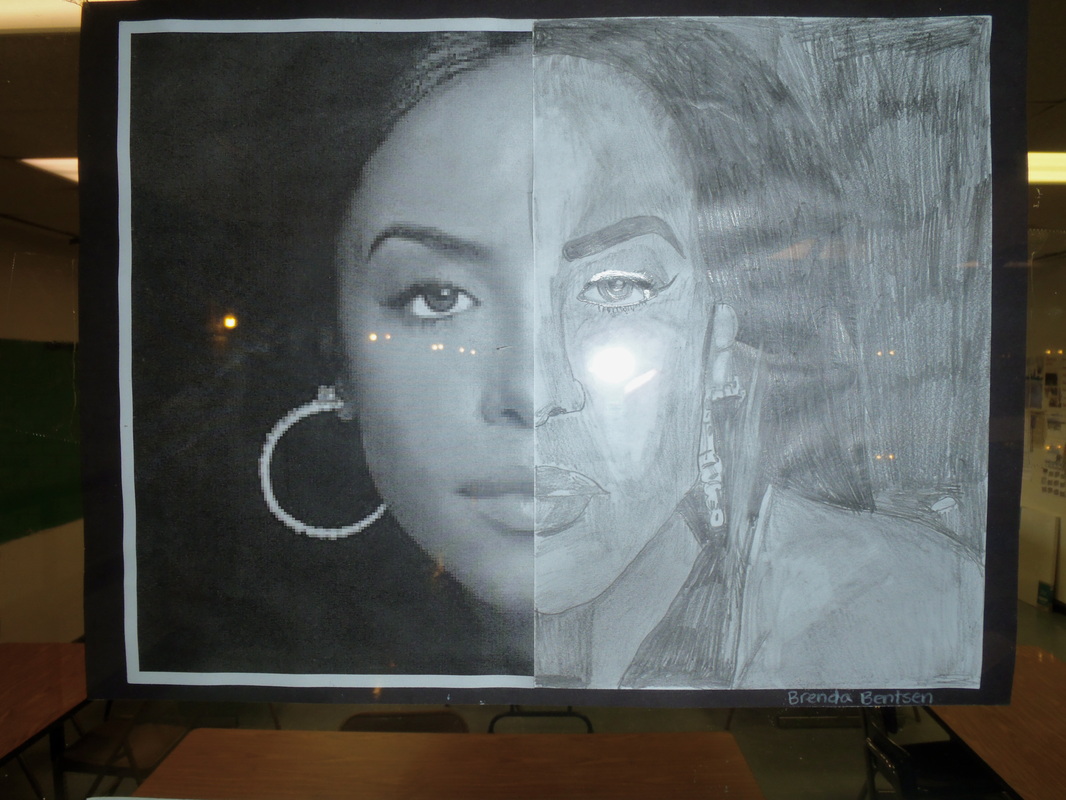
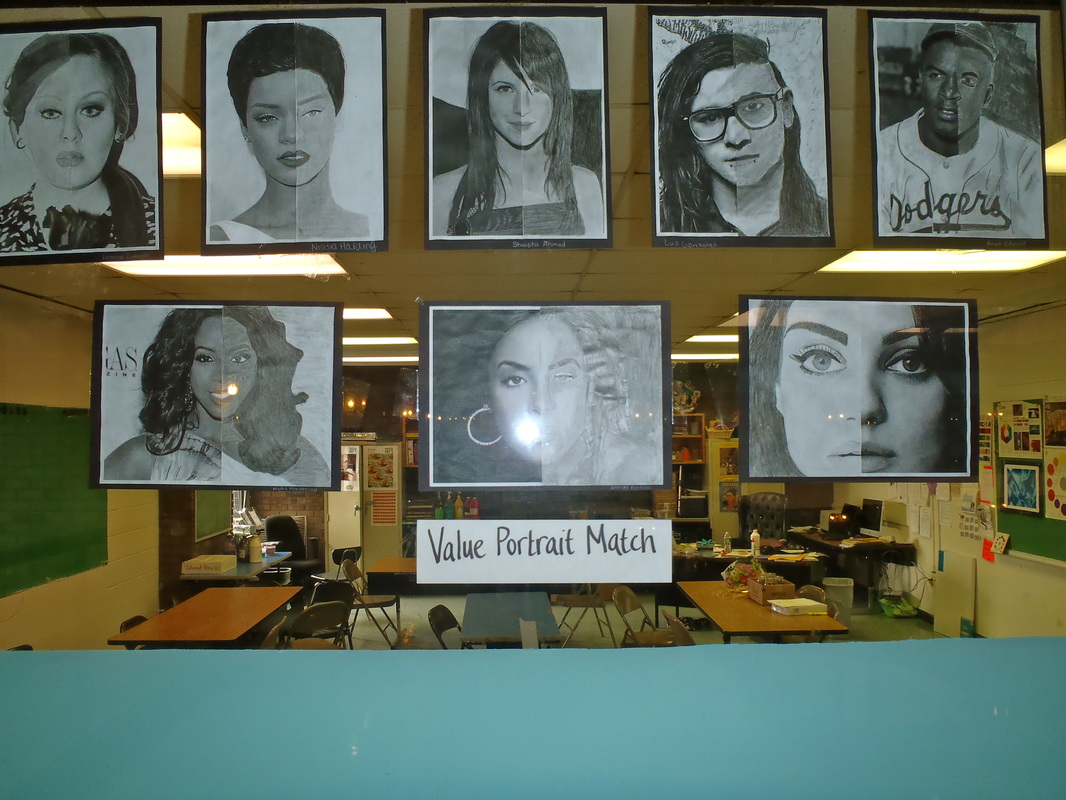
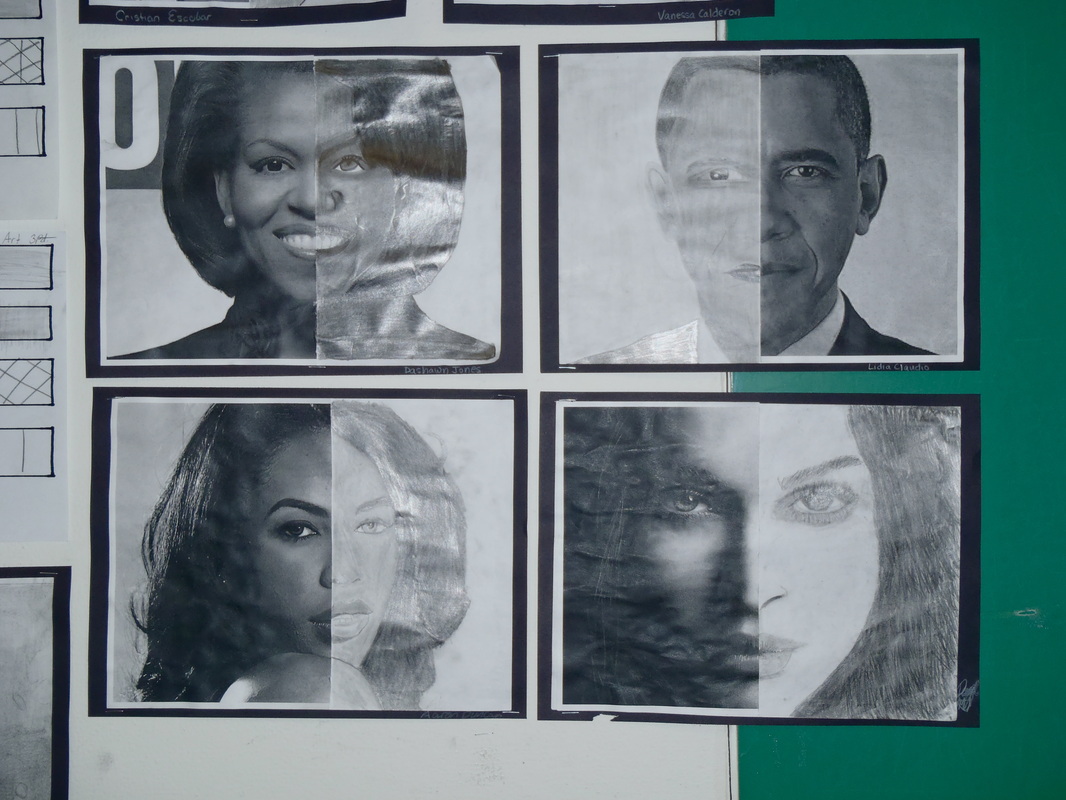
- Value Match: Students will find a portrait of a famous person facing forward and print it out. We will cut the image in have, pasting one half of the image to the paper and tracing the contour line of the other using a light table.
- Using the other half of the image as a reference, along with the students completed value scale worksheet for assistance, the student will “complete the image” by matching the value to the other half of the portrait. The goal is to create a seamless image that looks as if the photograph is continued into their drawing.
Day 11 - 16: PROJECT: Line, Shape, Value Design
- What is design? Discuss how design is created using line, shape, value, pattern and color. Where have we heard the word design? Where do we find it?
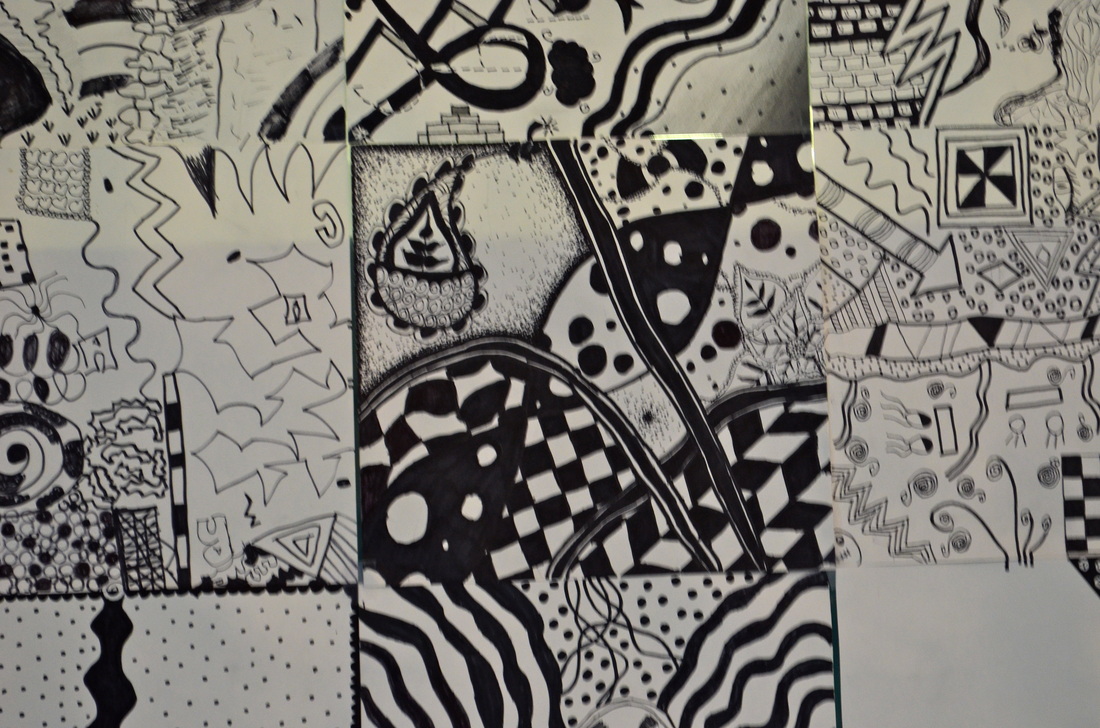
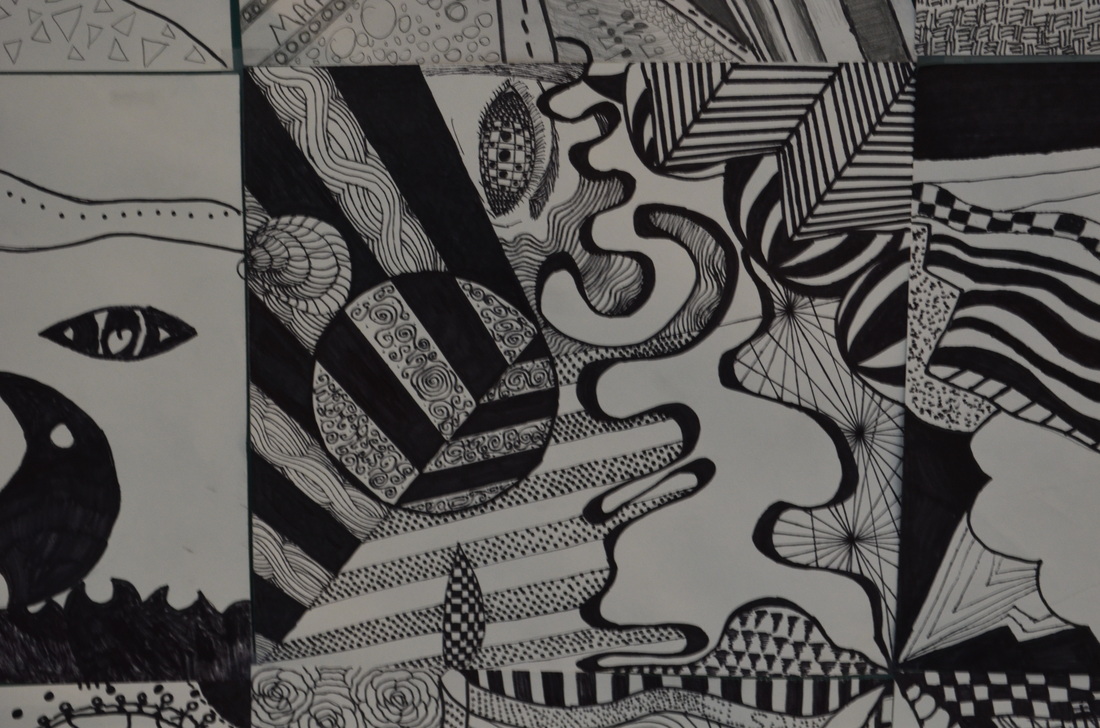
- Introduce the project to the students. Each student will get a paper with markings on the edges. These markings will connect to another student’s paper. They must do something with the lines while creating their own unique design that must show evidence of an understanding of line, shape, value, pattern and design. At the end, each paper will be put together with each student’s from the class to create one large, collaborative design. (Think quilt.)
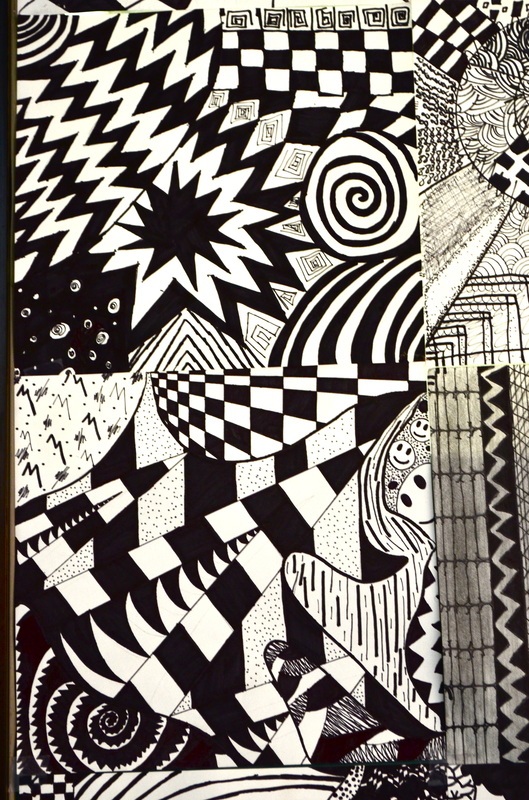
- Show the students the teacher example along with works of art created by Bridget Riley, Frank Stella and other current artists. Discuss how both artists used respectively, lines and shapes as the focus to create their artwork. Also discuss how each is different, how some leave a lot of negative space, while other artwork is filled with pattern.
- Allow the student’s time to sketch ideas for this project in their sketchbook. Remind the students to loosen up and be creative. The only wrong way to do this project is to not put in any effort.
- To motivate the students, while they are working, draw a line on the chalkboard and have the students to add a bit of design one by one. As the class continues, the design will grow showing the students how great this project can be, that they are capable of creating something great and at the same time, inspiring them with new ideas.
- Give each student their pre-marked poster paper and make sure that each paper is already numbered in the order they will go in. Make the students aware which is the top and that the students put their name lightly in pencil on the back.
- Hand out the Sharpies and rulers and allow the students their time to create. Remind the students that Sharpies are permanent markers, so if they make a mistake, they just have to make it work.
- If and when the students start asking if they can put their name in their design, challenge the students to hide it within their design instead of just plastering their name in it. Remind them that although their design will be their own, that this is still a collaborative piece of artwork and by putting their name in plain view, it will take away from the flow and continuity throughout the designs.
Closure:
Display each student’s design together as one large artwork. Hold a critique once this is displayed and discuss the work of art as an individual piece as well as collaboration. Questions to focus on:
- What do you see when you look at this artwork as a whole?
- Was the project successful? Why or why not?
- How do you think your design contributed to the entire design?
- If you could change anything about your project or the process, what would it be?
- What do you like the most about your work/someone else’s work?
Extended Practice:
Sketchbook Assignment:
- Draw a contour line drawing of a pair of shoes.
- Create a full-page line design of your name. You may use color, but line and shape must be incorporated into your design. Be creative and original!
Wall Text:
Line is not something that is just straight. A line starts with a dot and can go off in any direction. Line is also what helps us create shapes, patterns and designs, as well as texture and value. Using this knowledge and much creativity, the students each created their own individual designs with nothing more than a Sharpie marker. Each paper is connected to the next persons design, creating a very long line of design.
Resources:
- The Shape of Design by Frank Chimero: www.shapeofdesignbook.com/introduction.html
- Books of the named artists works.